From LiDAR Data to Digital Terrain Model (DTM)
This Jupyter Notebook illustrates the use of Bulldozer from an open data point cloud to the generation of the corresponding DTM.
We will:
- Download LiDAR data
- Convert it into a raster Digital Surface Model (DSM)
- Process it with Bulldozer to obtain a DTM
Data downloading and pre-processing
First of all, we'll start by creating a space to store the data for this tutorial and its associated virtualenv:
# (Run in terminal, not inside Jupyter if needed)

# Create the working directory
mkdir bulldozer_LiDAR_tuto && cd "$_"
# Create the virtual environment
python -m venv bulldozer_venv
source bulldozer_venv/bin/activate
We're going to download data from the IGN (French National Geographical Institute) LiDAR HD mission website : https://geoservices.ign.fr/lidarhd
The aim of this mission is to produce a 3D map of the whole of France and make it available in open data format. In particular, it provides surface data in point cloud format. In this tutorial we will use data from Nice:
# Download LiDAR data from IGN (Nice area)
!wget https://storage.sbg.cloud.ovh.net/v1/AUTH_63234f509d6048bca3c9fd7928720ca1/ppk-lidar/SP/LHD_FXX_1044_6299_PTS_C_LAMB93_IGN69.copc.laz
Convert Point Cloud to DSM
Since Bulldozer only handles raster format Digital Surface Models (DSM), we need to convert the point cloud into a raster. For this tutorial we will use the cars-rasterize tool to perform this conversion:
# Install cars-rasterize
!pip install cars-rasterize
# Convert LAZ → GeoTIFF DSM
!las2tif LHD_FXX_1044_6299_PTS_C_LAMB93_IGN69.copc.laz dsm.tif
Fix Missing CRS
By checking the DSM metadata with the command gdalinfo dsm.tif, we observe it doesn't contain a Coordinate Reference System (CRS):
import rasterio
from rasterio.crs import CRS

with rasterio.open('dsm.tif', 'r+') as dataset:
    dataset.crs = CRS.from_epsg(2154)

print("CRS successfully assigned!")
✅ Done! Our data is ready to be used with Bulldozer.

DTM extraction
Now that the data is ready, we can install Bulldozer with pip (for an alternative installation method, please refer to the corresponding section):
!pip install bulldozer-dtm
In this tutorial we will use the Command Line Interface (CLI) of Bulldozer but there are several different ways of running it (for alternative launch method, please refers to the corresponding section):
bulldozer -dsm dsm.tif -out output_dir -ndsm
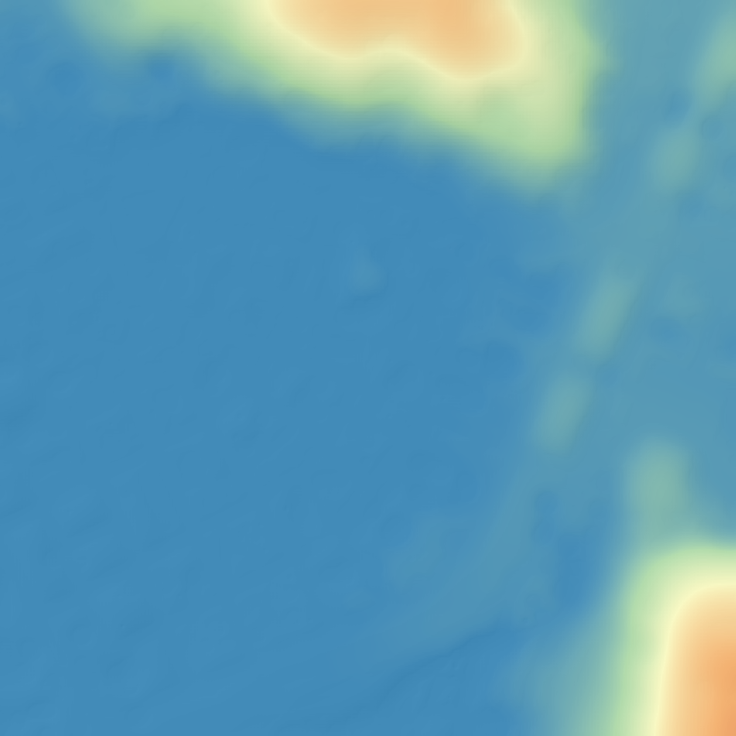
✅ Done! The resulting DTM is available in output_dir:
With tools like QGIS we can also draw profile to visualize the DTM (red line: DTM, black line: DSM):
